
Exterior outlets offer a convenient solution for powering garden tools, lighting backyards, and running various outdoor appliances. These outlets provide an effective way to eliminate extension cords and improve electrical safety outside. Installing an exterior outlet can, likewise, address your concerns about overloading circuits and damaging critical power sources. Access to outdoor power will also free up your indoor outlets to run your various home appliances and devices.
While installing an exterior outlet alone might be manageable for homeowners experienced with home wiring, the safest and most reliable route is to work with a licensed electrician. Here at Acosta Heating, Cooling & Electrical, we’re always available to provide expert assistance. Here’s how our team approaches exterior outlet installations.
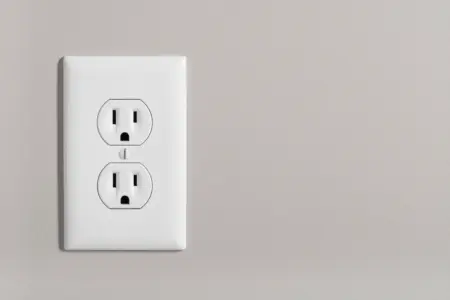
Evaluating Your Power Requirements and Outlet Options
Before installing your outdoor electrical outlets, we’ll assess your power needs. There are a few different power outlet types to consider, including standard 15-amp and 20-amp ground fault circuit interrupter (CFGI) outlets, each serving a distinct purpose.
Standard outlets are ideal for basic lighting solutions and running small appliances. The 20-amp GFCIs are more suitable for powering heavy equipment like air compressors and electric saws.
These GFCI outlets work great as an exterior solution because they incorporate a safety feature that cuts your power during a ground fault. When we wire the outlets, we ensure they adhere to the National Electrical Code (NEC) standards to deliver the safest installation. We also review your local regulations, especially since outdoor outlets must be waterproof and properly grounded to prevent electrical hazards.
All our wiring solutions are appropriately rated for exterior use and installed in grounded, weather-resistant boxes. Since the outlets include a shut-off feature that detects changes in current, they’re safe to operate outdoors. If a GFCI-rated solution does come into contact with water, unlike an indoor electrical outlet, its power cuts off to prevent electrocution.
For anyone who needs to increase the versatility of their outdoor space while enhancing safety, introducing an exterior GFCI outlet is a reliable way to accomplish this. Whether it’s for running outdoor seasonal holiday decorations or electric lawn equipment, you’ll find an exterior outlet installation to be a valuable property upgrade.
The Required Tools for Installing an Outdoor Outlet
Our licensed electricians use several tools to complete an outdoor outlet installation. We deploy a voltage tester to confirm an inactive circuit. We also use wire strippers to prep your wire connect and a power drill for placing holes in your exterior wall. Other tools we bring to the site include a screwdriver set, fish tape for guiding wires through tighter spaces, and needle-nose pliers to handle delicate wiring.
The installation also requires several essential materials and components. As mentioned, we use a waterproof electrical box that’s safe to use outside. We’ll also bring the GFCI outlet and a waterproof cover plate to protect it from moisture. Our professional installers utilize electrical conduit to safeguard the new wiring along with electrical tape and wire nuts to secure the solution’s various connections.
We also use safety gear like insulated gloves to prevent shock. This type of glove is essential whenever installing, repairing, or maintaining any aspect of your household power supply. Our electricians also wear safety glasses to protect against foreign debris and, potentially, a dust mask, depending on the amount of drilling involved. Our team members will bring a ladder to your home to reach higher installation points, and we always wear safety footwear with nonslip soles to optimize balance.
Preparation and Selecting the Outlet’s Location
Before installing your outlet, we’ll inquire about where you typically use your outdoor devices and equipment. We’ll also consult with you on where you plan to install future patios, outdoor kitchens, and lighting solutions. This approach helps ensure the most accessibility and keeps the outlet out of high foot traffic areas where power cables can get in the way.
After identifying the ideal location for your new outlet, we’ll inspect your existing wiring system and utilities. Our professionals use stud finders with inbuilt voltage detectors to identify hidden wires and plumbing system pipes behind your walls. These measures prevent accidental punctures that could damage your home or create hazards during the installation.
If we’re digging or laying wire during this process, our electrician will check with your local utility provider to ask about any below-ground utilities. Depending on your municipality and its local building codes, we may have to pull permits to install an exterior outlet. To ensure your home remains code-compliant, we’ll correspond with your local building department and advise of any specific requirements.
Once we’re ready to install the outlet, we’ll use a pencil to mark the selected area with several installation points, verifying they’re at least 6 inches above the soil to avoid moisture exposure. The main takeaway here is to choose the outlet location carefully. We also suggest that you keep in mind any improvement plans you’re considering for your outdoor living environment when selecting the installation site.
Installing the Exterior Outlet
When installing an electrical outlet, safety is always a top priority. As such, in the first installation step, we cut your main power supply at the circuit breaker to eliminate the risk of shock. Since we’ve already measured and marked your preferred installation site, we’ll double-check our work for accurate placement before drilling holes as required.
At this stage, our electrician will start securing the weatherproof box, usually on a wall or exterior post. We’ll ensure that there’s a firm fitment, the new box will hold up against the outdoor elements, and it protects your outlet’s electrical components from moisture.
Our installer will then begin laying out the wiring from the main power source to the new installation site. As we establish the wiring route, we’ll make sure everything is out of sight and well-secured. At this stage, we can connect the wires to your main power supply and electrical box before installing the outlet.
In the final steps, our electrician will attach the GFCI outlet to the electrical box, confirming that all wiring connections are secure and the box is watertight enough to prevent moisture ingress. Finally, we’ll switch your power back on at the circuit and test the new outlet.
The Importance of Working With a Licensed Professional
As you can see, while installing an outlet might seem simple at first glance, the task can get complex rather quickly. This is especially true if the job entails multiple installation sites and complicated wiring solutions. Depending on the scope of the installation, a new exterior outlet could require specialized knowledge and tools to ensure compliance with your local building codes. Partnering with our licensed electricians ensures a safe outlet that minimizes the risk of electrical hazards and faults.
For your next electrical installation, trust our experts at Acosta Heating, Cooling & Electrical. In addition to outlet and switch installation, we help Charlotte, NC, homeowners with electrical repair services, generator installation and repairs, and a comprehensive range of heating and cooling solutions.
To schedule a service or learn more about how a new exterior outlet can enhance convenience and safety at your home, contact us at Acosta Heating, Cooling & Electrical today!